SPCC Rule Overview (40 CFR Part 112)
SPCC Rule Overview: 40 CFR Part 112 mandates spill prevention‚ control‚ and countermeasure plans for facilities handling oil․ Regional inspectors evaluate compliance‚ focusing on containment‚ monitoring‚ and corrective actions․ The rule ensures environmental protection and operational accountability․ 2026!!
Key Provisions and Scope
Key provisions of the SPCC rule require facilities that store or process oil in quantities above the EPA thresholds to develop a written SPCC plan‚ conduct regular inspections‚ and implement corrective actions․ The plan must identify the type of oil‚ storage capacity‚ and potential spill sources‚ and it must include secondary containment with a capacity at least 110% of the largest tank․ Facilities must establish a spill response team‚ conduct training exercises‚ and maintain a log of all spills‚ including volume‚ location‚ response time‚ and corrective measures․ The rule also mandates that the plan be reviewed by the EPA and updated at least every five years․ Non‑compliance can result in civil penalties‚ corrective orders‚ and potential suspension of operations․ The rule’s scope covers all equipment and activities that could cause spills‚ requiring risk assessments and control measures to reduce spill likelihood․ daily updates and!
Compliance monitoring requires quarterly inspections of secondary containment‚ verification of leak integrity‚ and documentation of corrective actions․ Training programs must cover spill response procedures and responsibilities of the spill response team․ Operators should log every spill event‚ recording volume‚ location‚ response time‚ and corrective measures taken‚ and submit a comprehensive log to EPA annually to ensure transparency and regulatory compliance․ Failure to comply can trigger enforcement actions‚ including civil penalties corrective orders‚ jeopardizing continuedoperations fully

EPA Guidance for Regional Inspectors
EPA guidance assists regional inspectors in evaluating SPCC compliance under 40 CFR 112․ The 117‑page PDF (4․3 MB) outlines inspection procedures‚ containment standards‚ and corrective actions․ It is also available to owners‚ operators‚ and the public to ensure transparent‚ enforceable compliance for all users!!!

Purpose and Intended Audience
EPA’s SPCC Guidance for Regional Inspectors equips inspectors with a detailed framework for evaluating compliance with the Spill Prevention‚ Control‚ and Countermeasure (SPCC) Rule (40 CFR 112)․ The guidance outlines the scope of inspections‚ the methodology for assessing secondary containment‚ monitoring protocols‚ and the criteria for determining corrective actions․ It is tailored for EPA regional inspectors who conduct on‑site evaluations of facilities that store‚ handle‚ or use petroleum products․ Additionally‚ the document serves as a valuable resource for facility owners and operators seeking to understand regulatory expectations and to prepare effective SPCC plans․ By clarifying the roles‚ responsibilities‚ and expectations of inspectors‚ the guidance promotes consistency‚ transparency‚ and enforcement across the nation․ The guidance also addresses emerging issues such as digital monitoring‚ data management‚ and the integration of new technologies into SPCC compliance․ Through detailed examples‚ checklists‚ and best‑practice recommendations‚ inspectors can identify gaps‚ recommend improvements‚ and ensure that facilities meet the environmental protection standards set by the EPA․ The guidance is updated regularly to reflect legislative changes‚ court decisions‚ and evolving industry practices‚ serving as a living document that supports continuous improvement in spill prevention and environmental stewardship․

Federal and State Regulatory Alignment
EPA’s SPCC Rule (40 CFR 112) aligns with state laws on oil spill prevention‚ requiring secondary containment and monitoring․ Inspectors verify compliance across jurisdictions‚ ensuring federal standards are met while respecting state‑specific mandates․
Compliance Requirements Across Jurisdictions
Regional inspectors must navigate a complex mosaic of federal‚ state‚ and local mandates that govern oil spill prevention and control․ The core federal framework—40 CFR 112—requires facilities that store‚ handle‚ or use oil to develop a Spill Prevention‚ Control‚ and Countermeasure (SPCC) plan‚ install secondary containment‚ and conduct regular monitoring․ The state often adopt the federal rule verbatim‚ but many add supplemental provisions such as stricter spill reporting thresholds‚ expanded definitions of regulated facilities‚ or additional training requirements for personnel․ In some jurisdictions‚ the Environmental Protection Agency’s (EPA) guidance is supplemented by state‑specific environmental protection agencies that issue their own inspection protocols‚ enforcement schedules‚ and penalty structures․ For example‚ California’s Department of Toxic Substances Control (DTSC) requires a more detailed containment design and mandates that facilities submit quarterly spill reports‚ whereas Texas’s Department of Environmental Quality (TEQ) focuses on real‑time monitoring and rapid response plans․ Inspectors must therefore cross‑reference the federal rule with each state’s statutes and regulations‚ ensuring that any overlapping or conflicting requirements are reconciled․ This often involves reviewing state‑specific SPCC guidance documents‚ such as the EPA’s “SPCC Guidance for Regional Inspectors” (PDF‚ 117 pp) and state‑issued compliance manuals․ Additionally‚ local ordinances may impose further restrictions on storage capacities‚ buffer zones‚ or emergency notification procedures․ Failure to satisfy the most stringent requirement—whether federal or state—can result in enforcement actions ranging from civil penalties to facility shutdowns․ Consequently‚ inspectors employ a tiered compliance matrix that lists applicable federal provisions‚ state amendments‚ and local ordinances‚ assigning priority levels and deadlines for corrective actions․ This systematic approach ensures that facilities meet all applicable legal obligations and that inspectors can provide clear guidance to facility operators on how to achieve full compliance across all jurisdictions․ By maintaining an up‑to‑date repository of regulatory changes and engaging in continuous training‚ inspectors can adapt to evolving requirements and provide clear guidance to facility operators on how to achieve full compliance across all jurisdictions․ Stay updated‚ comply!OK

Inspection Preparation and Planning
Inspectors review facility records‚ SPCC plans‚ and audit results․ They assemble a checklist covering containment‚ monitoring‚ and training․ A pre‑inspection meeting clarifies scope‚ schedule‚ and required documentation․ Proper preparation ensures efficient on‑site evaluation․
Pre-Inspection Checklist
Inspectors must verify key documents and conditions before visiting a facility regulated under 40 CFR Part 112․ The following items form a concise‚ yet comprehensive‚ pre‑inspection checklist․
- Facility Scope: Confirm legal name‚ address‚ and operations subject to the SPCC rule․ Verify total oil volume stored or handled․
- SPCC Plan: Obtain the latest plan and any amendments․ Check that the plan includes a site map‚ containment details‚ monitoring procedures‚ and corrective action protocols‚ and that it is approved and retained․
- Compliance History: Review prior inspection reports‚ enforcement actions‚ and corrective action plans to ensure all findings are resolved․
- Secondary Containment: Verify that tanks‚ containers‚ and transfer equipment have documented secondary containment meeting capacity and integrity standards‚ with maintenance logs and recent repairs․
- Monitoring Logs: Ensure up‑to‑date logs for spills‚ leaks‚ and containment breaches are complete‚ legible‚ and stored per record‑keeping rules․
- Training Records: Confirm that all personnel involved in oil handling and spill response have current training certificates and dates․
- Emergency Response Plan: Verify that the plan addresses oil spills‚ includes local authority contacts‚ and has been reviewed within the last 12 months․
- Facility Condition: Inspect tanks‚ piping‚ and containment structures for corrosion‚ leaks‚ or damage that could compromise integrity․
- Regulatory Correspondence: Gather recent EPA or state agency letters regarding SPCC compliance‚ including notices of violation or requests for information․
- Inspection Logistics: Schedule date‚ time‚ duration‚ and arrange necessary equipment and brief all inspectors on layout and hazards․
During the pre‑inspection phase‚ inspectors should also verify that the facility has a current spill response equipment inventory‚ that all spill kits are accessible‚ and that the facility’s environmental monitoring equipment is calibrated․ Additionally‚ confirm that the facility has a documented plan for reporting spills to the EPA within 24 hours‚ as required by the rule․
Inspectors should review the facility’s hazardous waste management records to ensure no oil residues are inadvertently disposed of in a manner that violates secondary containment requirements․ Also‚ verify that any temporary storage areas used during maintenance or transfer operations are compliant with secondary containment standards․

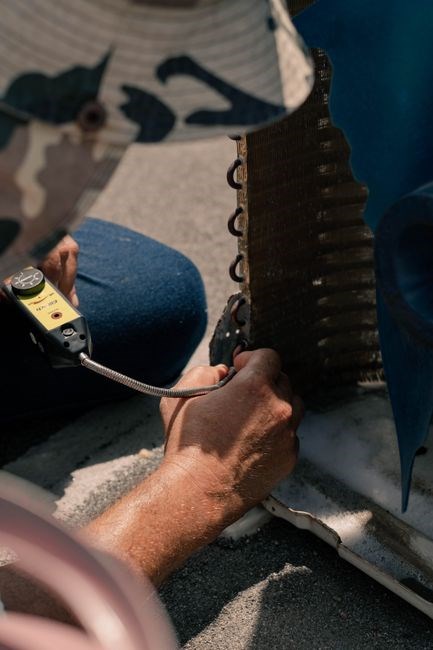
Onsite Inspection Procedures
Inspectors assess tank integrity‚ secondary containment‚ and monitoring logs․ They verify spill response readiness‚ review training records‚ and inspect transfer equipment․ Observations are documented‚ and any non‑compliance is noted for corrective action․ All logged data; inspection now!!!!
!!!
Inspection Steps and Key Observations
Pre‑inspection briefing – Confirm the facility’s scope‚ review prior audit reports‚ and identify high‑risk areas․
Visual tank inspection – Examine all storage tanks‚ including roof‚ walls‚ and caps‚ for cracks‚ corrosion‚ or leaks․
Secondary containment check – Verify dikes‚ berms‚ and spill basins for structural soundness and proper drainage․
Transfer equipment assessment – Inspect pumps‚ valves‚ hoses‚ and leak‑stop devices for wear and proper seals․
Monitoring system verification – Ensure gauges‚ alarms‚ and automatic shut‑off devices are calibrated and functioning․
Spill response kit inspection – Confirm availability of absorbents‚ containment booms‚ and personal protective gear․
Training log review – Check employee competency records for recent spill‑response drills․
Perimeter walk‑through – Confirm no unauthorized access points․
Sampling – Collect oil and water samples for laboratory analysis to detect contamination levels․
Report compilation – Document findings‚ highlight non‑compliance items‚ set corrective action deadlines‚ and schedule follow‑up inspections․
Key observations include visible corrosion on tank walls‚ missing spill containment dikes‚ uncalibrated pressure gauges‚ and inadequate employee training records․ These findings directly influence enforcement actions and potential penalties under 40 CFR Part 112․
SPCC compliance is a dynamic process that requires continuous monitoring‚ timely corrective actions‚ and proactive risk management․ By rigorously following these inspection steps‚ regional inspectors can ensure that facilities not only meet regulatory standards but also protect the environment and public health․

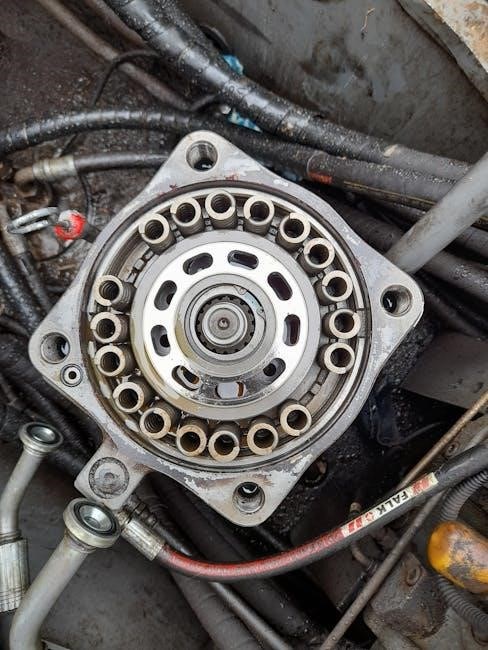
Secondary Containment and Tank Requirements
SPCC mandates tanks meet secondary containment standards: dikes‚ berms‚ or double‑wall tanks to capture spills․ Inspectors verify integrity‚ drainage‚ and leak detection․ Proper labeling‚ capacity limits‚ and regular maintenance are essential for compliance․ Inspectors verify basins‚ berm slopes‚ shut‑off valves!!
Containment System Standards and Compliance
SPCC Rule 40 CFR 112 requires that all oil‑handling facilities implement secondary containment that can hold at least 110 % of the largest storage tank’s capacity․ The containment must be designed to prevent any spill from reaching the environment‚ using dikes‚ berms‚ double‑wall tanks‚ or a combination of these․ Inspectors verify that containment structures are constructed from approved materials‚ have proper slope and drainage‚ and are maintained in a leak‑free condition․ The rule mandates that containment systems be inspected at least annually‚ with records of inspections‚ repairs‚ and leak‑detector tests retained for five years․ Facilities must install leak detection devices that can identify a 0․1 % loss of tank volume within 24 hours․ The containment must also be equipped with automatic shut‑off valves that can isolate the tank within 30 seconds of a detected leak․ Compliance requires that all tanks and piping be labeled with “SPCC” and that the plan include procedures for immediate containment‚ cleanup‚ and reporting․ Inspectors evaluate the adequacy of the containment by measuring the volume of the dike or berm‚ verifying that it can hold the required capacity‚ and confirming that the system is free of cracks‚ corrosion‚ or other defects․ Failure to meet these standards results in enforcement actions‚ including fines‚ mandatory corrective actions‚ and potential suspension of operations․ The EPA provides guidance documents that detail the design criteria‚ inspection procedures‚ and record‑keeping requirements for secondary containment‚ ensuring that facilities maintain a robust barrier against oil spills․ Inspectors record dike and berm dimensions‚ double‑wall tank integrity‚ and verify spill containment by simulating a spill scenario․ Documentation must include photos‚ inspection dates‚ and corrective action plans‚ ensuring traceability and compliance․ All records are retained for five years per EPA guidance!!

Documentation‚ Reporting‚ and Enforcement
Documentation must include inspection logs‚ corrective action reports‚ and spill incident summaries․ Reporting to EPA follows the 40 CFR 112 format‚ with electronic submission via EPA’s e‑SPCC portal․ Enforcement actions range from civil penalties to facility shutdowns for non‑compliance․ 2026 Enforcement․!

Regional inspectors must submit a comprehensive report to the EPA using the 40 CFR 112 reporting structure․ The primary format is the electronic SPCC (e‑SPCC) portal‚ which captures inspection data‚ identified deficiencies‚ and corrective action plans․ Each report must include the facility’s SPCC plan‚ a summary of observed violations‚ and the timeline for remediation․ EPA guidance specifies that corrective actions be documented in a corrective action report (CAR) that details the root cause‚ corrective steps‚ responsible parties‚ and verification of completion․ Failure to comply can trigger civil penalties ranging from $1‚000 to $10‚000 per violation‚ and in severe cases‚ temporary or permanent shutdown of the facility․ Enforcement actions are guided by EPA’s Enforcement Policy‚ which prioritizes corrective measures over punitive fines when feasible․ Inspectors should also maintain a log of all communications with facility operators‚ including notices of violation (NOV) and notices of intent to comply (NITC)․ The documentation must be retained for at least five years and be available for audit by state or federal agencies․ By adhering to these reporting formats and promptly addressing corrective actions‚ facilities can avoid escalating penalties and maintain compliance with the SPCC rule․ The CAR must be filed within 30 days of the inspection‚ and the facility must provide evidence of corrective action completion within 60 days․ EPA may issue a Notice of Violation if actions are not completed‚ imposing a fine of $10‚000 until the compliance achieved EPA will enforce